Table of Contents
Navigating an airport can be overwhelming, especially for first time flyers unfamiliar with airport procedures. From check-in to security screenings, boarding, and baggage claims, each step comes with its own set of procedures. Understanding the airport process step by step isn’t just about convenience, it can save you time, prevent frustration, and make your travel experience genuinely enjoyable.
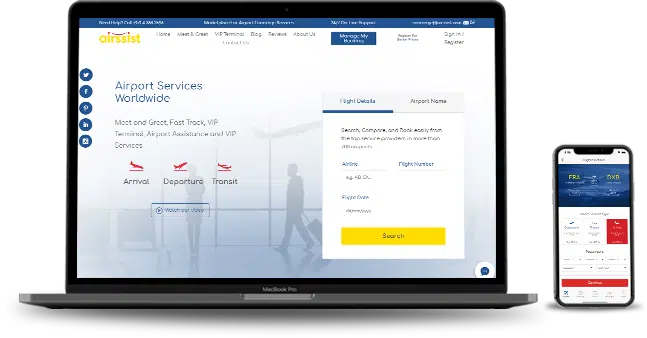
This complete guide walks you through airport procedures step by step for both domestic and international flights, helping you feel confident and prepared whether you’re a first time traveler or need a refresher on what to do at the airport. For travelers seeking the ultimate stress-free experience, airssist’s airport meet and greet services provide personal assistance through every airport step from curb to gate.
QUICK AIRPORT PROCEDURES CHECKLIST
CHECK BEFORE YOU GO: ✓ Valid passport/ID ✓ Printed or mobile boarding pass ✓ Luggage packed per airline rules
ARRIVE AT AIRPORT: ✓ Domestic flights: 2 hours early ✓ International flights: 3 hours early
STEP BY STEP PROCESS:
- Check-in and bag drop
- Security screening
- Immigration (international only)
- Find your gate
- Board when called
- Enjoy your flight
HELPFUL LINKS:
- Fast track security: Skip the lines
- Airport concierge: Full assistance
Step 1: Research Airport Procedures Before You Travel
Before setting foot in the airport, arm yourself with knowledge. Research your destination’s entry requirements, visa regulations, and any travel advisories. Check the airline’s website for hand Luggage Rules, prohibited items, and any specific rules you need to follow. It’s better to be well-informed and avoid surprises.
For international flights, understanding airport procedures step by step international requirements is crucial. Research your destination country’s entry requirements, visa regulations, customs restrictions, and any COVID-19 related rules that may apply. Many countries require specific documentation, vaccinations, or pre-arrival registrations. Check the official government website of your destination country at least 2-3 weeks before departure. First time international travelers should also familiarize themselves with essential airport hacks that make the process smoother.
Step 2: Purchase Your Plane Ticket Ahead of Time
This can be conveniently done online or directly through your airline. By securing your ticket in advance, you’ll save valuable time at the airport, eliminating the need to purchase your ticket on-site. Additionally, if the online ticket purchase allows you to print your boarding pass, we highly recommend taking advantage of this option, particularly if you’re traveling without checked baggage.
Step 3: Pack Smart, Pack Light
When packing for your trip, be mindful of the luggage restrictions. You are typically allowed one piece of checked luggage and one smaller carry-on item to bring on the plane. To make your checked bag easy to identify, consider adding a distinctive tag, ribbon, or using a unique colored bag. This can help prevent mix-ups if your luggage looks similar to someone else’s.
- If you are carrying any liquids, gels, or aerosols in your carry-on, make sure they adhere to the TSA 3-1-1 rule. All containers must be 3.4 ounces (100 milliliters) or less, and they must be stored in a single, 1-quart sized, resealable plastic bag. Only one of these bags is permitted per passenger. Familiarizing yourself with these liquid restrictions ahead of time will help your security screening go smoothly.
Step 4: Arrive Early
It is recommended to arrive at the airport 2 hours early for domestic flights and 3 hours early for international flights before your scheduled departure time. This buffer time is crucial for completing all airport procedures without stress, accounting for potential delays in traffic, parking, check-in lines, security screening, and finding your gate.
The airport departure process typically takes longer during peak travel times like early mornings (6am to 9am), late afternoons (4pm to 7pm), and holiday periods. If you’re traveling during these busy times, consider adding an extra 30 to 60 minutes to your arrival time. For guaranteed peace of mind and faster processing, airssist’s fast track security service can reduce your screening time from 30+ minutes to under 5 minutes.
Step 5: Locate Your Airline’s Check-in Counters
These will be clearly marked by signage outside the terminal building along the departures roadway, as well as the airline’s logos displayed on the wall and above the counters. Join the appropriate line and wait patiently until called forward. There is typically a sizing bin available to check if your luggage meets the carry-on size requirements, or if you need to check it. Remember, you are generally limited to one piece of checked luggage and one smaller carry-on item. Ensure you have your identification document readily available.
Step 6: The Check-In Process
When prompted, present your identification document to the check-in agent. If you have luggage to check, place it on the designated area of the counter as directed. The agent will then affix the necessary tags and either place it on the conveyor belt behind the counter or instruct you to carry it over to a scanner. If you have no bags to check, simply inform the agent. In either case, the agent will then provide you with your boarding pass, unless you have already obtained it through other means.
If you do not have any checked bags and have already checked in online, you can skip this entire check-in process at the counter. Instead, you can retrieve your boarding pass by:
- Accessing it on the airline’s website and printing it
- Pulling it up on your mobile device using the airline’s app
- Printing it at one of the self-service kiosks located in the airport
Step 7: Proceed to the Security Checkpoint
A security officer will check your boarding pass and ID before allowing you to proceed. Ensure you have a valid, government-issued ID, as the requirements may vary by state.
- You will then wait in line to pass through the x-ray machine and metal detector. This airport checking process is the same whether you’re flying domestic or international, though international security may be more thorough. Place all your bags, metallic items, and shoes on the conveyor belt to be scanned. If you have a clear, quart-sized bag of liquids, remove it from your luggage for separate screening. Similarly, take out any large electronic devices, such as laptops, tablets, or gaming systems, and send them through the x-ray individually.
- Remove any jackets, sweatshirts, or other outerwear, as those will also need to be screened. Take off all metal objects, including keys, jewelry, and belts, and place them on the belt. Finally, remove your shoes and put them on the conveyor as well. If you are unsure of the process, feel free to politely ask the security personnel for guidance.
The security checkpoint is often the most time-consuming part of airport procedures. During peak hours, security lines can take 30 to 45 minutes or longer. To minimize wait time, consider these tips: travel light with minimal carry-on items, wear slip-on shoes, have your ID and boarding pass ready before reaching the agent, and follow the TSA 3-1-1 liquid rules carefully. For business travelers and those with tight connections, expedited security services can be a game-changer.
Step 8: Retrieving Your Items
Wait patiently until a security agent directs you when to proceed through the metal detector or x-ray machine and onto the other side of the conveyor belt. This is the area where you will retrieve your belongings after they have been screened. Once on the other side, replace any items you may have removed from your bags, put your shoes back on, and exit the security checkpoint.
Step 9: Locating Your Departure Gate
Know that you are now in the secure boarding area. Gate numbers correspond to the specific zones where you will board your plane. The gate number may have been provided by the airline agent, it might be printed on your boarding pass, or you can locate it on the departure information monitors throughout the area. Follow the visible signage indicating the gate numbers to find the appropriate location for your flight.
Step 10: Powering Up for the Wait
Take a seat in the designated gate area and wait for your flight to begin boarding. It’s a good idea to have two fully charged portable power banks with you, in case your device batteries run low during any delays, when wall outlets may be scarce.
Step 11: Presenting Your Ticket for Takeoff
Wait for the gate agents to announce boarding and give you instructions. As you approach the jetway leading to the aircraft, present your boarding pass to the agent, who will scan it and return it to you. In some cases, the agent may detach and retain a portion of the boarding pass.
Step 12: Stowing Your Belongings for the Flight
Locate your assigned seat and stow any larger bags in the overhead compartment. If you have a smaller personal item, you can conveniently slide it underneath the seat in front of you, keeping the space around your feet clear.
Step 13: ENJOY YOUR FLIGHT !!!

Airport Procedures for International Flights: What’s Different?
International airport procedures involve additional steps that domestic travelers don’t encounter. Understanding these differences helps first time international flyers navigate with confidence.
Before You Leave Home:
International travel requires more documentation than domestic flights. Essential items include:
Required Documents:
- Valid passport (must be valid for at least 6 months beyond your travel dates for most countries)
- Visa or entry permit if required by your destination country
- Return or onward ticket proof
- Travel insurance documentation
- Vaccination certificates if required
- Customs declaration forms (often provided on the plane)
Financial Requirements: Some countries require proof of sufficient funds for your stay or a minimum amount of local currency upon arrival. Research these requirements for your specific destination.
At the Airport – International Departure Process:
The airport procedures step by step for international flights include everything domestic travelers do, plus these additional steps:
1. International Check-In: International check-in counters often have longer wait times. Airlines verify your passport, visa, and travel documents during check-in. Arrive at the airport at least 3 hours before international departure.
2. Customs Declaration (if applicable): Some countries require you to declare items you’re taking out, especially if carrying large amounts of currency, valuable items, or restricted goods.
3. Outbound Immigration: After security, you’ll go through passport control where an immigration officer stamps your passport and verifies your travel documents. This step doesn’t exist for domestic travel.
4. International Terminal and Gates: International gates are typically located in separate terminal sections with different amenities, including duty-free shopping and international airport lounges .
At Your Destination – International Arrival Process:
Arriving in a foreign country involves several steps domestic travelers never encounter:
1. Immigration Control: You’ll present your passport, visa, and arrival documents to an immigration officer who may ask about the purpose of your visit, length of stay, and accommodation details. Answer honestly and have supporting documents ready if needed.
2. Baggage Claim: Collect your checked luggage from the designated baggage carousel for your flight.
3. Customs Inspection: Before exiting the airport, you must pass through customs. You’ll declare any items that exceed duty-free allowances. The customs process varies significantly by country, some have a simple “nothing to declare” green channel, while others inspect all bags thoroughly.
4. Currency Exchange and Local Transport: After clearing customs, you can exchange money, get a local SIM card, and arrange transportation to your final destination.
Tips for First Time International Travelers:
Managing airport procedures for international flights becomes easier with these strategies:
- Keep all travel documents in one easily accessible place
- Make copies of your passport and important documents
- Have a pen ready for filling out arrival forms on the plane
- Familiarize yourself with customs restrictions for your destination
- Know basic phrases in the local language (Hello, Thank you, Where is…)
- Have your accommodation address written down clearly
For travelers wanting a completely seamless international airport experience, airssist’s international concierge service provides a personal greeter who meets you at the aircraft door, escorts you through immigration and customs, and ensures you reach your ground transportation quickly and efficiently.
More Information About Airport Procedures
Check-in
Your flight ticket alone is insufficient for boarding the plane – you also need a boarding pass. The check-in process is what generates this crucial document, which contains details like your seat assignment, departure time, and gate information.
The check-in process involves three main steps:
- The initial check-in, where you provide confirmation to the airline that you intend to take the flight.
- Checking in your luggage with the ground handling staff. Your bags will be tagged and sent to your destination, so be sure to review your airline’s baggage guidelines beforehand to ensure your items meet the size and weight requirements.
- Obtaining your boarding pass, which you will then need to proceed through security.
The check-in process is your first official airport step and sets the tone for your journey. For first time flyers, this can feel intimidating, but understanding what to expect makes it straightforward. Most airlines now offer online check-in 24 hours before departure, allowing you to skip counter lines entirely if you don’t have bags to check. Mobile boarding passes are accepted at most airports worldwide, though it’s wise to have a backup paper copy just in case.
Security Check
- Present yourself for the security screening. This will involve a physical pat-down as part of the standard procedure. Throughout this process, be sure to keep your identification and boarding pass readily available. The airport security process can be the most stressful part of airport procedures for first time travelers. Common mistakes include forgetting to remove laptops from bags, wearing complicated shoes with laces, or packing prohibited items in carry-ons. To breeze through security, wear simple clothing without metal, pack smartly, and observe what experienced travelers ahead of you are doing.
For travelers who fly frequently or have tight connections, TSA PreCheck (in the US) or similar programs in other countries offer expedited screening. Alternatively, airssist’s fast track service provides immediate priority access without requiring program membership. - Place your carry-on luggage, metallic items, and electronic devices in the designated tray for x-ray screening. If you have any metallic medical devices in your body, such as a pacemaker or artificial joint, have a doctor’s certificate on hand to present to the security staff.
- After clearing the baggage screening, collect your belongings and proceed further. For a domestic flight, you can now enter the airside terminal area. For an international flight, you will next need to go through Immigration and Customs controls.
Immigration and Customs at Departure
For international flights, you may undergo Immigration and Customs checks both during departure and arrival.
- Be sure to have your ID, passport, visa, and any other relevant travel documents ready when presenting yourself for these checks. Be prepared to state the purpose of your trip.
- Familiarize yourself with the restrictions on items you can carry, such as exotic pets, certain foods and plants, or items subject to import/export duties. The immigration and customs process varies significantly by country. Some nations have strict agricultural restrictions (like Australia and New Zealand), others focus heavily on currency declaration (many Asian countries), and some have zero-tolerance drug policies with severe penalties (Singapore, UAE, Japan). Research your specific destination’s customs rules carefully. Accidentally bringing in prohibited items, even in small amounts, can result in fines, confiscation, or even arrest in certain countries. Consult with your airline to ensure you are not attempting to transport any prohibited items, which could pose risks like the spread of infections.
- There are also regulations on the amount of money you can carry, both domestically and internationally. Research the specific limits for the countries you are traveling to and from and plan your finances accordingly. Some destinations may even require you to have a minimum amount of local currency upon arrival.
- It’s crucial to thoroughly review the guidelines, as simply possessing certain banned substances can result in prosecution in some countries. Ensure you are fully compliant with all relevant regulations before embarking on your journey.
Waiting Areas / Duty Free / Airport Lounges
Now that you’ve cleared security and entered the secure airside area, you have some options on how to spend your time.
If you’re interested in browsing or dining, the shops and restaurants in the secure terminal area are available. However, keep in mind that prices for items and services here will likely be significantly higher than what you’d find at similar establishments near your home.
Alternatively, if you’d prefer to wait in a more comfortable setting, you can head to one of the airport lounges. These offer amenities like plush seating, quality food and beverages, internet access, and more. If you have free airport lounge access through your airline or travel rewards program, heading there directly may be a better option than waiting at the gate. Even if you don’t have complimentary access, many airport lounges allow single-day entry for a fee, typically ranging from $30 to $75 USD depending on the airport and lounge quality. For first time flyers, a lounge can transform a stressful airport experience into a relaxing, comfortable wait with amenities like showers, comfortable seating, quality food and drinks, fast WiFi, and business centers. airssist can arrange guaranteed lounge access at thousands of airports worldwide, regardless of your ticket class or airline.
Departure
With your boarding pass in hand, make your way to the assigned gate. Keep in mind that boarding typically closes 10-20 minutes prior to the scheduled departure time. If you happen to be running late, the airline will call out the names of late passengers at least twice before closing the flight. However, once the flight is officially closed, no further passengers will be allowed to board.
Takeoff
As you approach your seat, the flight attendant greets you warmly, guiding you down the aisle. Stow your bags in the overhead compartment, then switch off your mobile device in preparation for takeoff.
Get settled comfortably in your seat and listen attentively as the flight crew provides the important safety instructions. Fasten your seatbelt – it’s time for the main event. 3, 2, 1… The engines roar to life, building speed as the plane accelerates down the runway. The tarmac becomes a blur beneath you, and suddenly, you’ve achieved liftoff – you’re airborne!
In-Flight
Once the seatbelt sign has been turned off, you’re now free to unfasten your seatbelt.
With the restriction lifted, you can now take advantage of the various in-flight entertainment options provided. Whether you choose to engage with the on-board amenities or simply sit back and admire the stunning vistas outside. Clouds have never seemed more interesting, have they?
Touchdown
The second most exhilarating part of air travel, after takeoff, is the landing. Prepare to feel a subtle jolt as your plane touches down on the runway. Once it has taxied to the arrival gate, follow the guidance of the flight crew as they direct you towards the exit.
Immigration and Customs at Arrival
Before you can exit the airport, you’ll need to go through one final round of immigration and customs procedures. While the specific requirements can vary by country, you can generally expect the following:
- The immigration area will have separate queues for citizens of the host country versus other nationalities. Be sure to stand in the appropriate line to avoid any delays or mixups.
- Avoid using electronic devices like phones or cameras while in the immigration zone, as they may be confiscated by the authorities. This is especially common when going through immigration in the United States.
- Have your important documents, such as your passport and visa, easily accessible in your hand luggage. This will allow you to quickly present them for review by the officials.
- You may be asked questions about the purpose of your visit. Respond calmly and truthfully to these inquiries.

You Can Avoid All Above With Just One Click
Understanding airport procedures step by step helps you feel prepared and confident, but wouldn’t it be better to have an expert guide you personally through every airport step? Whether your trip is for business or leisure, you can transform the airport process from stressful to seamless with airssist’s airport concierge services.
Our services include:
- Personal greeter who meets you at the curb or aircraft door
- Assistance with all check-in procedures and baggage handling
- Fast track security to skip standard lines entirely
- Immigration and customs escort for international travel
- Lounge access with comfortable amenities
- Personal escort to your departure gate
- Luxury ground transportation to and from the airport
For first time flyers and seasoned travelers alike, airssist handles all airport procedures so you can focus on your journey, not the logistics. Book your personalized airport assistance today.
Frequently Asked Questions
At what point do you go through immigration when you are leaving a country? Is it before or after check in?
You don’t go through immigration when leaving a country. You go through immigration when arriving in a country that is not your native country.
What do I do when I reach the destination? Do I just leave the airport?
When you get to your destination, get off the plane and claim your bags. Then you can leave.
Will my metal knee replacements be a problem when going through airport security?
Before you travel, get a note from your doctor and copies of your x-rays if possible. Check with the airport to find out if any other supporting documents will be necessary to go through security.
What do I do on arrival at the airport?
The first thing you should do at the airport is check in for your flight. Look for your airline’s desk, have your photo identification ready and ask the customer service agent for the next steps.
How do I get through the airport when travelling with a small dog?
Security will ask you to take your dog out of the carrier. You can either walk or carry your dog through the metal detector.
After the plane lands, where do I go to collect my bags?
Follow signs to the baggage claim. There, you will find a screen which tells you what luggage belt to go to. There you will find your bags.
When can I pick out my seats for the airplane?
Usually, unless you are flying an airline that doesn’t have assigned seats (check on their website for this information), you will be able to pick your seats when you buy your tickets
I have 1 hour to connect flights; will I have enough time to eat at a restaurant in the airport?
You won’t have time for a sit-down meal, but you could pick something up to take with you to your next gate.
If I have a boarding pass on my iPhone, do I still need to print out a boarding pass?
No.
What is the airport process step by step for first time flyers?
The airport process step by step for first time flyers includes: (1) Arrive at the airport 2-3 hours early, (2) Find your airline’s check-in counter or kiosk, (3) Check in and drop off any luggage, (4) Proceed to security screening with your boarding pass and ID, (5) Remove shoes, jackets, laptops, and liquids for x-ray scanning, (6) Collect your items after screening, (7) Find your departure gate using the airport monitors, (8) Wait at the gate area until boarding is announced, (9) Board the plane when your group is called, (10) Stow your carry-on and find your seat. For international flights, add immigration/passport control after security. First time flyers often feel overwhelmed, but personal airport assistance can guide you through each step.
What should I do at the airport step by step if I’ve never flown before?
If you’ve never flown before, follow this airport procedure step by step: Upon arrival, look for your airline’s logo on signs and head to their check-in area. Bring your ID and confirmation number. At check-in, the agent will print your boarding pass and tag your luggage. Next, follow signs to security. Remove items from pockets, take off shoes, and place everything in bins for screening. After clearing security, locate your gate number on your boarding pass or departure monitors. Arrive at your gate at least 30 minutes before departure. Listen for boarding announcements. When your group is called, have your boarding pass ready and proceed to the plane. A flight attendant will help you find your seat. For nervous first time flyers, booking airport concierge assistance eliminates all stress by providing a personal guide through every step.
How long does the airport departure process take from arrival to boarding?
The airport departure process typically takes 60 to 90 minutes for domestic flights and 90 to 150 minutes for international flights, though this varies significantly based on airport size, time of day, and season. Breaking it down: check-in takes 10-20 minutes (or 2 minutes with online check-in and no bags), security screening takes 15-45 minutes, and walking to your gate takes 5-20 minutes depending on the airport. International flights add 20-40 minutes for immigration processing. During peak travel times (holidays, early mornings, weekends), add 30-60 extra minutes to these estimates. Many airlines close boarding 10-15 minutes before departure, so build in buffer time. Travelers who need guaranteed faster processing can use fast track security services to reduce total airport time by 30-45 minutes.
Note: Please note that the information on this page is generic & subject to change due to fluctuations in airport services. Kindly confirm service availability with our team, as offerings may vary daily.